Vintages Style DIY Jars Covers: How To Make Some. Hello friends. ahaoe sre you today?
Vintages Style DIY Jars Covers: How To Make Some:
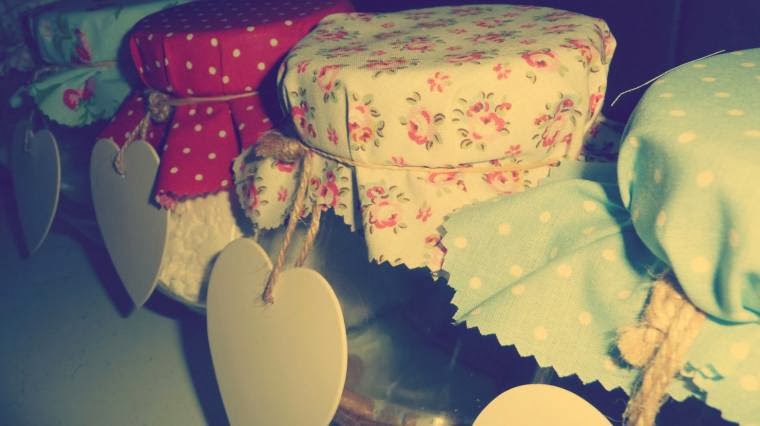
Having lots and lots of glass storage jars in the kitchen I wanted to jazz then up a little and make the kitchen a bit more shabby chic style.
I love this material I picked up last May with my birthday money but as the material cost me £25.00.
I never dare to cut it up, just in case it turned out wrong.
Months and month later.
And a brand new pair of pinking shears, I decided to put some of the ideas floating around in my head in to practice!


Vintages Style DIY Jars Covers: How To Make Some What You Need:
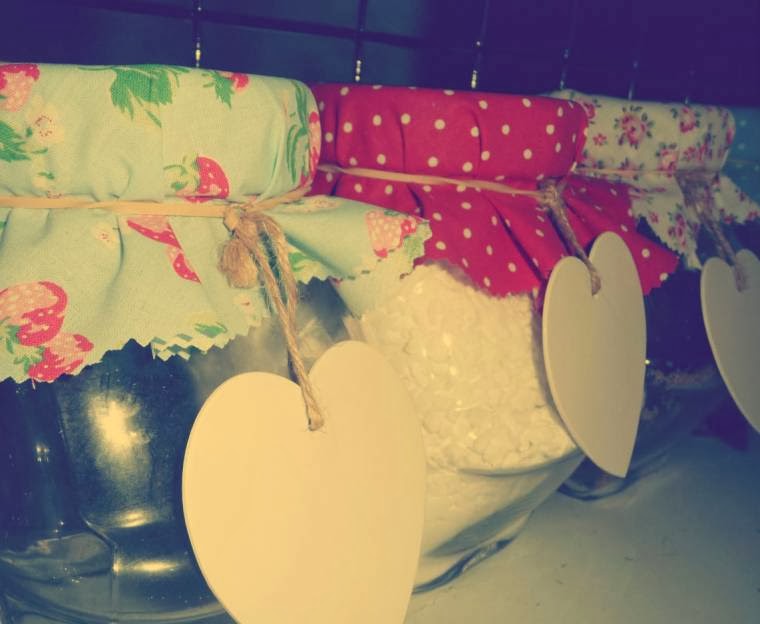
Some glass storage jars ~ (I found the screw tops are the best to cover, ones with the metal catches don’t turn out as nice it make a bit of a bulky front bit).
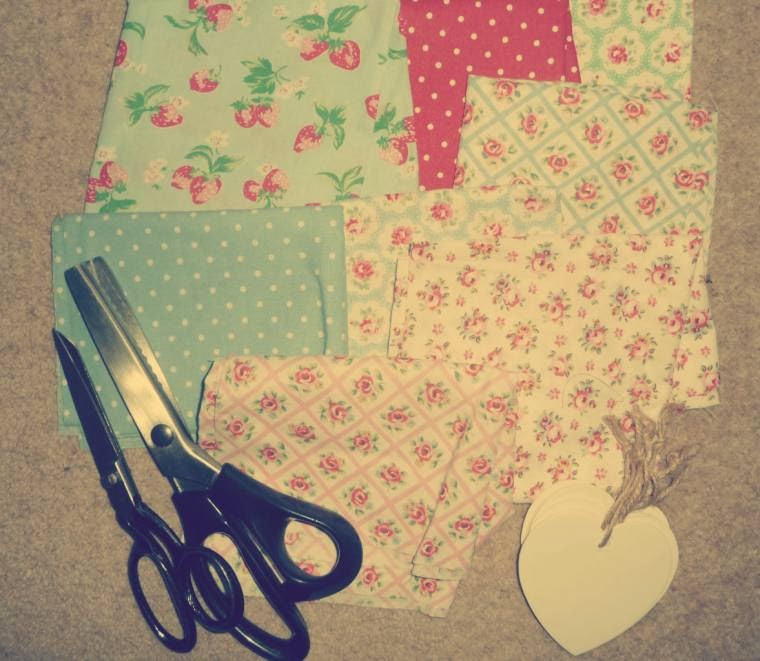
Enough material for all your jars, mix and match or all the same.
Piece of paper to practice a pattern for the top of the jars, best to get it perfect before you cut it out.
Paper scissors and pinking shears to cut the material.
Elastic bands (1 for ever jar).
Tags (1 for every jar).
Vintages Style DIY Jars Covers: How To Make Some What To Do:
Firstly, place the paper and mould it over the jar, makes a little mark roughly where you want the covers to finish.
Cut a square roughly around where you would like the cover size to be.
Fold the square in half, then half again, then half again, so looks like an ice cream cone.
Cut a round the top (like picture 2 above but paper first) or like the top of a heart shape for more flowery tops, and it should be circle or flowery when opened. Best to practice a few times and pick with paper then to pick your favourite pattern.
See if it fits right or you need to make a larger one or trim this one down.
Practice a few styles and experiment with shapes on the paper, I made some like flowers and some like love hearts by cutting the tops different ways.
Place the pattern on the material and cut with pinking shears, this will create a nice zig zag edge that won’t need sewing.
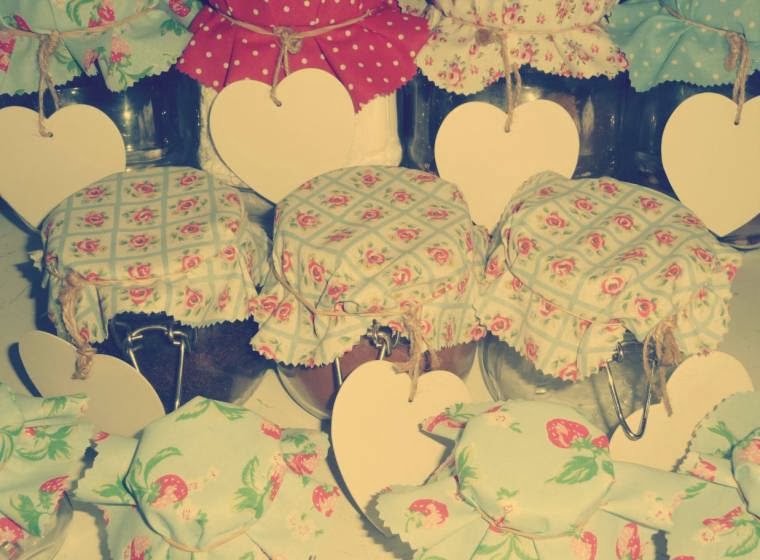
Place on top of the jar.
Get a tag and knot and elastic band around the tag.
Place the band around the top of the jar to hold the material on and makes it look like a hat.
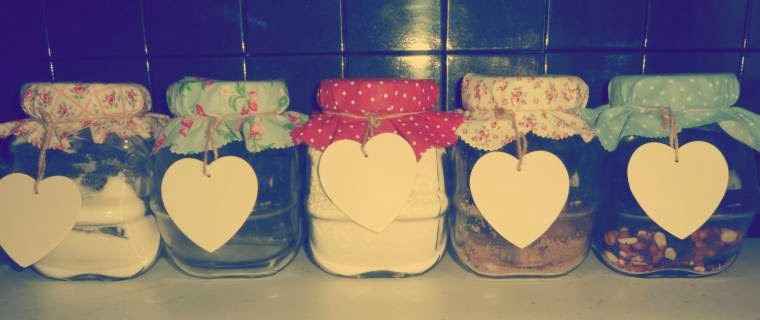
Vintages Style DIY Jars Covers: How To Make Some
See I have lots and lots of jars.
I made all shapes and size tops for all different size jars.
And fancy jars in the kitchen now 🙂
You Might Also Like:
Vintage Inspired Valentines Tablescape:
Firstly, with Valentine’s day is just around the corner is has put me in the mood for cooking up a romantic meal for two. Vintage Inspired Valentines Tablescape.
Vintage Inspired Tablescapes:
Secondly, through-out February and the month of love, this was my vintage inspired tablescape.
I love to dress my table up and take pictures, do you?
It makes’s it look pretty and inviting for dinner.
I was planning Valentine’s day table setting and I had some beautiful flowers I got as a lovely Valentine’s day gift and they matched one of my dinner tableware sets perfectly. Vintage Inspired Tablescapes.
Neon Pink Tea Dress 50’s Vintage Style Polka Dot:
Ladt but not least, yeah, the sun is shining and the sky is blue. Time to grab the shades and out with my favourite dress I brought this week.
This vintage, vintage style dress is covered in my favourite pattern ~ polka dots!! What a great colour too?
It was just laying on the floor at a car boot sale.
The dress was in a pile of clothes just begging to be snapped up by me.
Also only £1-00.
It would be rude not to buy it wouldn’t it? Neon Pink Tea Dress 50’s Vintage Style Polka Dot.
- Maxi Dress Vibes: Rocking My Red Dress Across
- Denim Combat Jeans | What I’m Wearing Lately
- 11 Homemade Easter Recipes To Try Out
- Styling My Cream Long Chelsea Style Boots
- 5 Upcycle Garden Ideas
- 11 Easter Cakes You Will Want To Bake
- Ghostbusters Car Spotted In London
- Alice Quotes From Alice In Wonderland
- How To Rock A Colourful Pleated Skirt
- Well Hung Lover | Street Art, Bristol
- Hair Bow Inspiration For The Modern Woman
- Mickey Mouse In New York Disney Store
- Styling My Hello Kitty Blue Polka Dot Boots
- Raining Cats And Dogs & Red Converse All-Star
- Styling My Blue Star Converse
Finally, lovelies;
I hope you like this post?
If so, why not follow along so you never miss a post? So remember you can also share your thoughts here too in the comments below.

Oh I so need new pinking shears – I have my mum's old ones from about 1973 and they just chew the fabric up – Alice @ Mums Make Lists
Oh, it's a nice idea, thank you for sharing 🙂
Author
Thank you 🙂
So adorable! Thanks for sharing tutorial!Have a wonderful week!Hugs from Portugal,Ana Love Craft
Author
Thanks for the lovely comment 🙂
They look great. Hopping by via #Weekendbloghop
Author
Thanks for linking up 🙂
They look great ..what a good way to smarten the kitchen up …
Author
Aww thanks, glad you got to see them earlier 🙂
I used to buy already made ones, but I can now Do-It-Myself. Thanks Claire.
Author
Thanks Nekky, I have looked everywhere for some but never seen any…
So pretty! (Honest Mum)
Author
Thanks 🙂
Very cute and a good idea! They make your kitchen look really special!x
Author
aww thanks Kezzie, I lam very pleased with them 🙂
These are very beautiful and very romantic!I just love romantic things 🙂
Author
Thanks Winnie x
Brilliant,and it looks so good.XXXXXXXXXXXXXXXXXXXXxx
Author
Aww thank you 🙂
Very cute! So glad to finally see what you were up to!!
Author
Haha, I tried not to be to long in posting,,,thanks Amy 🙂
They look lovely and are great for homemade gifts also:)~Anne
Author
Thanks Anne, whoo gave me an idea for Valentines day 🙂